This article relates to the previous version of the ClockShark Mobile app listed as ClockShark Mobile Time Clock in the app store.
The current version is listed as ClockShark Time Tracking. Learn more about the current version in ClockShark Mobile App.
You can also distinguish between the current ClockShark Mobile app and the legacy version by comparing their logos. The current app uses the more modern orange ClockShark logo whereas the legacy app uses the classic white logo.
| Legacy version | Current version |
Installation
To get started with the mobile app, it needs to be installed on your smartphone. Search the app store on your phone for "ClockShark" or follow the links below for your device.
Download ClockShark for iOS (Apple iPhone & iPad)
Download ClockShark for Android
Log into the app using the email address and the password you set up when accepting the ClockShark account invitation email. If prompted, allow the app to access Location Services.
NOTE: ClockShark does record your location while you are on the clock. There is no GPS tracking by the app unless you are clocked in for work. When you've clocked out or on break, you are not being tracked and no location data is being saved.
Time Clock
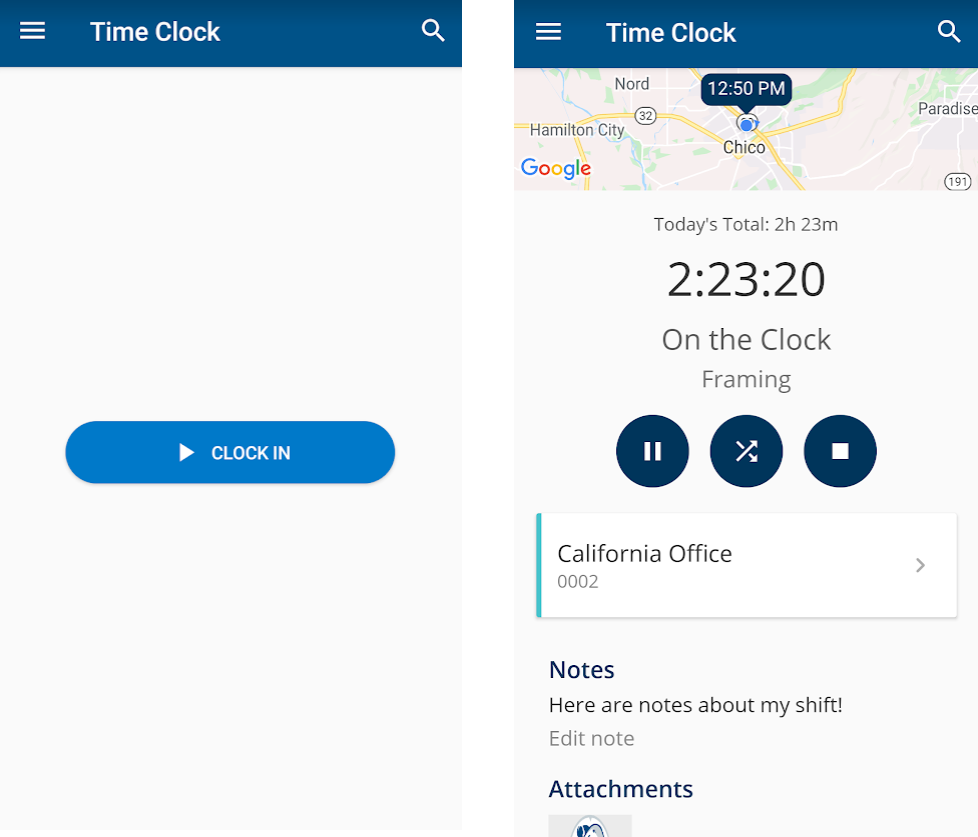
Tap Clock In to start work. Then, choose your job and your task.
If you need to switch jobs or tasks during the day without clocking out, tap the switch button (the crossing arrows) and select a new job and task.
To go on break or take lunch, tap break (the pause button). When you come back to work, just tap end break (the play button) and you're right back to the same job and task you had selected before you left.
Use the search bar to filter for jobs you want to see. Tap a job to view the description, location, and attachments for that job.
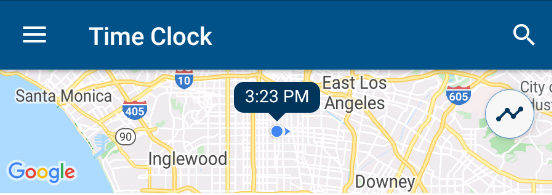
The map at the top of the screen shows you your last tracked location. If GPS tracking is turned on for ClockShark, you will be able to see exactly what location data we are using for your clock-in. If you have the GPS tracking feature enabled for yourself, this map will update throughout the day to show you your last-used location data as well.
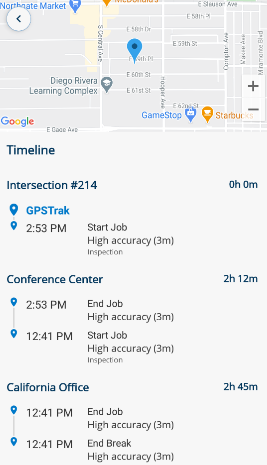
Tap the Timeline icon to view all your clock in, clock out, start a break, end a break, and GPS tracking locations for the day so far. When you are off the clock you can review your own location data.
Tap Add a note below the job card on the Time Clock page to add notes. Tap + in the lower left to add attachments.
To finish work for the day, tap clock out (the stop button) to end your shift and stop all time and location tracking. You do not need to log out of the ClockShark app every day.
Schedule
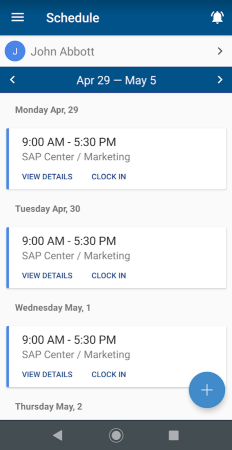
If your employer is using the scheduling feature in ClockShark, you can tap Schedule from the slide-out menu to view your upcoming shifts.
Tap an upcoming shift to view information about the job including any notes or files attached to it and the map location. Tap Route for directions to the job address.
Time Sheets
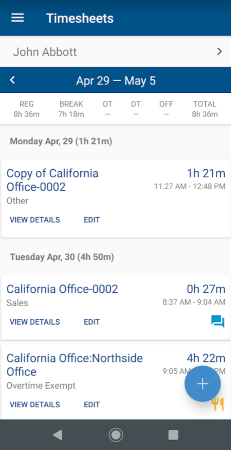
Tap Time Sheets from the slide-out menu to view all of your time segments for each week along with totals for your regular, overtime, and break hours. The current week is shown by default, and you can change weeks using the arrows at the top of the screen.
Tap a time segment to view details, including the job and task selected, the location of the clock punches, and any notes or attachments.
Sync Queue
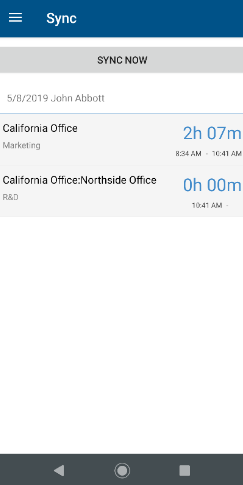
When you are out of cell service or wifi range, the app will store all clock punches on the device until it reconnects to cellular or wireless internet, then it will sync all the data up to the cloud. This sync should happen automatically, or you can manually sync from the Sync screen. Tap Sync from the slide-out menu. To sync data in the list, tap Sync Now. If there is nothing on the list, all your data is already synced.
Crew Clock

This feature is not available on every account. Check with your company's account administrator if you have any questions.
Crew Clock is a feature that allows supervisors and foremen to punch the clock for other employees or for entire crews at once. You can access this screen by selecting Crew App from the slide-out menu.
Start by selecting which crew members you want to work with by tapping on their names. With the employees selected, tap the checkmark icon on the top of the screen to bring up the actions menu. Select the option you need for the action you want to take. The options are:
- Clock Crew In
- Switch Crew
- Start Crew Lunch
- End Crew Lunch
- Clock Crew Out
Depending on which action you select, you may have additional steps to complete the process, such as selecting a new Job and Task when switching your crew or adding notes when clocking your crew out. The final step is to confirm the action and you're done.
Who's Working Now
This feature is not available on every account. Check with your company's account administrator if you have any questions.
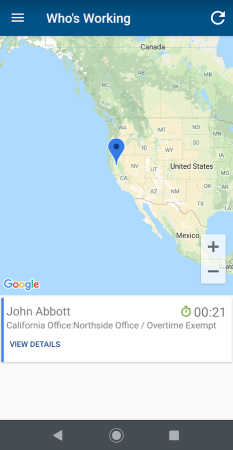
The Who's Working Now screen, as you probably guessed by the name, will show you a list of everyone clocked in right now and their location on a map. You can access this screen by selecting Who's Working Now from the slide-out menu.
The map on the top of this screen shows you the location of each clocked-in employee with a pin in their employee color. You can set each employee's color by editing their employee record on the admin website. Below the map is a list of all the employees shown on the map.
Tap the name of the employee in the list to zoom the map to their location so you can see where they are. You can see the details of each employee's current time segment by tapping on the information icon next to their names on iOS or by tapping the View Details link on Android.
Time Off
This feature is also not available on every account. Check with your company's account administrator if you have any questions.
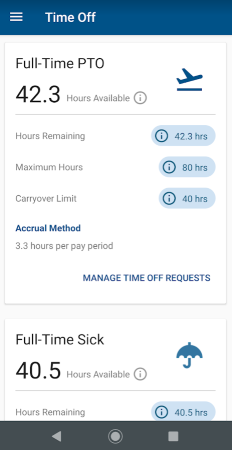
The section will show you any Time Off policies you are a part of as well as your hours remaining, maximum hours, carryover limit, and the accrual method.
Tap Manage Time Off Requests you can see your available hours, hours already requested, pending requests, and you can submit a new request by tapping the + in the lower right corner.