Before you start
- Have an active ADP Run account.
- ADP Run cannot have ClockShark and ADP Time & Attendance (T&A) active at the same time. You must cancel T&A before setting up this integration.
- Make sure the ADP Timesheet Import feature is enabled in ADP Run:
- Go to settings > features and services, ensure the option Marketplace connector for paydata input API is checked.
- If the option above is not checked, reach out to ADP Customer Service & Support to enable this.
- The integration setup must be started, purchased, consented, and finished by the same admin in both ClockShark and ADP Run.
- The ADP Marketplace charges a $5/month fee for the connector, which can be attached to your existing ADP Invoice or a new payment method.
- We recommend scheduling with the ClockShark Integrations Team to walk through setup, training, and your first export from ClockShark to ADP Run.
- If you have more than one ADP Company Code in a single ADP Run account, or already have an accounting/payroll integration with ClockShark, connect with the ClockShark Integrations Team to schedule a special workflow integration.
Integration Setup
If you do NOT have a ClockShark account or trial:
- Go to the ADP Marketplace, and log in with your ADP Admin credentials.
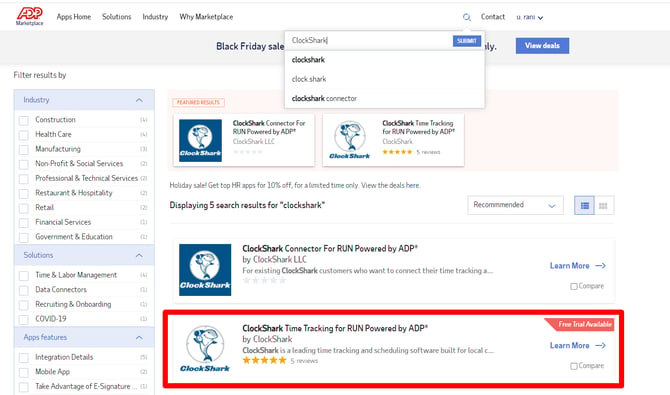
- Select Apps Home, search for ClockShark in the search bar.
- Ensure to select the required option ClockShark Time Tracking for RUN Powered by ADP.
- Select the pricing plan (Standard or Pro) for ClockShark. Learn more in ClockShark Pricing.
- Click Continue.
- Enter your payment details, and select Continue.
- Review the order and check the box to agree to the Terms of Service and Place Order.
- After this process above, skip the steps 1-9 below, and continue from step 10.
If you already have a ClockShark account or trial:
- In ClockShark, go to Admin > Integrations > +Add ADP.
- Copy and keep the Activation Code.
- Note: Avoid copying spaces before or after the code as it would affect.
- In this new opened ADP Marketplace tab, log in with your ADP Admin credentials.
- Select Browse and search “ClockShark” in the search bar.
- Ensure to select the required option ClockShark Connector For RUN Powered by ADP®.
- Select Buy Now, and then click Countinue. Next to ClockShark LLC requires additional information, click Edit and enter the Activation Code from ClockShark and select Continue.
- Enter your payment details, and select Continue.
- Review the order and check the box to agree to the Terms of Service and Place Order.
- In ClockShark, navigate to Admin > Integrations > Manage ADP, select the link click here to consent to share data with ClockShark. This will bring you into a new tab from the ADP Marketplace where you can approve the connection. After approving the connection, navigate back to the open ClockShark Manage ADP tab and select Retrieve and Save your Client Credentials in ClockShark.
- On the Manage ADP page, assign Default ADP Earnings Codes for the Regular Hours, Overtime Hours, and Doubletime Hours tracked in ClockShark. If your ADP account does not track Overtime and/or Doubletime, input the highest level Earnings Code you track into the default Overtime and Doubletime Earnings Code fields.
- If you also have 1099 employees, a separate set of 3 dropdowns will appear to select the 1099 Compensation Earnings Code for all 3 options (RT/OT/DT). This will appear upon syncing employees.
- You can check your overtime setting in ClockShark, under Admin > Company > Payroll and Overtime, to ensure they are set up correctly for your business.
- Map existing ClockShark employees to existing ADP employees by selecting the View & Edit Mappings button. On the Employees tab, select Sync ADP Employees. If the Auto Map box is checked, existing employees in ClockShark with the same emails and/or names will map together. Start the sync by pressing Sync Employees. Employees with different names or spellings can be manually mapped by selecting the pencil icon for an unmapped ADP employee and then selecting the correct, unmapped ClockShark employee from the drop-down list and selecting Update Mapping.
- The left-hand column displays ADP users that are available to map ClockShark users to, the right-hand column shows the ClockShark users mapped to the ADP user. Only ClockShark users tracking time in ClockShark need to be mapped and will be included in the time data export from ClockShark to ADP.
- The dropdown list will show only active, unmapped ClockShark employees.
- Only ADP users that have been 100% set up in ADP are available options to map ClockShark users to.
- 1099s set up in ADP as Individuals can be mapped to ClockShark users. ClockShark can not connect to 1099s set up as Businesses in ADP.
- ClockShark Pro only: To map ClockShark Time Off policies to ADP, select the Time Off mapping tab. Existing ClockShark Time Off Policies are visible on the left-hand column. To map them to the correct corresponding ADP Earnings Code, select pencil icon for an unmapped policy, and select the correct ADP earnings code from the drop-down to update the mapping.
- One ADP Earnings code can be mapped to multiple ClockShark Time Off Policies. When CS Time Off is mapped to the same Earnings Code as ADP Time Off, the ADP time off balances will update to reflect the time off taken.
- Optional: It’s possible to map ClockShark tasks to ADP departments, to enable time data imported into ADP to be broken apart into multiple ADP departments and/or pay rates. Learn more in ClockShark Task/ADP Department Mapping.