Using these customizable stages help you organize jobs and view them through filters in the way you prefer, making it easier to track the job lifecycle from start to finish.
Set up job stages
-
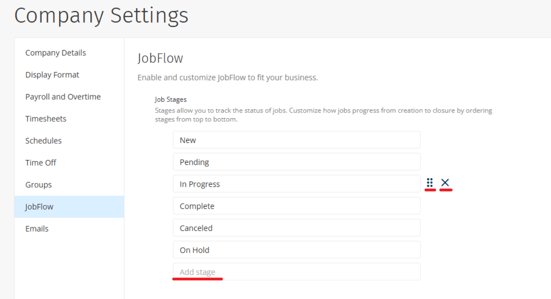
Click Admin > Company Settings > JobFlow.
-
Use the existing job stages or edit the stages by the way you need:
-
Click into the specific stage field to rename it.
- Click into the Add Stage field to add a new customized stage.
- Click x icon to delete the stage.
- Click and drag six dots icon
 to reorder the stages.
-
- Click Save.
You can create as many stages as you like.
Once you have completed editing all your preferred stages, you are ready to use them around the website.
Note: Only the employee with the administrator role in the web portal can create and edit the job stages.
Update job stages
Once the stages are created, you can update the stage for each job to reflect its current status.
Both administrator and employee roles with the Add and edit Jobs permission will have the ability to change the stages for jobs.
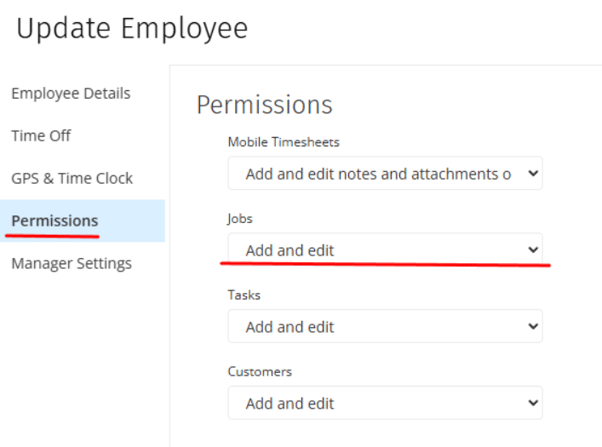
Learn more about the details on employees' permissions in How to Use Roles and Manager Settings.
You can assign or update job stages in a few different areas in the web portal.
|
Navigation |
Steps |
Update Type |
|
From WORK > Jobs list |
Select the checkboxes on the left of per job and> click Update Stage on top blue color menu |
Bulk update |
|
When creating a new job |
Click Stage from the dropdown options |
Single update |
|
From WORK > Jobs list |
Click the three dots icon > Update Stage |
|
|
When viewing the Job details page |
Click Actions > Update Stage |
|
|
When viewing the jobs for a customer |
Click the three dots icon > Update Stage |
View and filter job stages
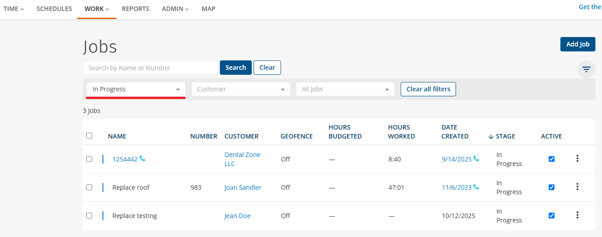
View and filter job stages from the Jobs page:
- Click WORK > Jobs.
- Click the required Stage from the field in the top left to select a job stage.
- Click Apply.
The dropdown options include the stages you created on the Company Settings page.
View and filter job stages from the Timesheets page:
- Click TIME > View.
- Switch the display field from Employees to Jobs in the top-right corner.
The left side column will now display the current stage of each job.
View and filter job stages from the Schedules page:
- Click SCHEDULES.
- Click Filter icon
 in the top right corner.
 - Click the Filter Jobs field in the top left corner to choose single or multiple job stage options from the dropdown.
- Click Apply.
Note: Job stage updates can only be performed using the web portal. This functionality is not available on the mobile application.