Requirements
- ClockShark Standard or Pro subscription is ready to use.
- MYOB AccountRight (AR) Plus or Premier for Australia or New Zealand is ready to use.
- MYOB file hosted on MYOB’s Cloud Software service has been set up.
Data mapping between ClockShark and MYOB
|
ClockShark Employees |
MYOB Employees |
|
ClockShark Jobs |
MYOB Jobs |
|
ClockShark Customers |
MYOB Customers |
|
ClockShark Tasks |
MYOB Activities |
|
ClockShark Paid Time Off Policies |
MYOB Payroll Categories |
Authorize ClockShark and MYOB
To authorize the ClockShark and MYOB integration:
- In ClockShark, go to Admin > Integrations, and click +Add for MYOB.
-
If you already have an established ClockShark integration with an accounting partner, disconnect the existing integration before starting the MYOB integration or contact ClockShark support team to set up a dual integration.
2. On the MYOB authorization page, enter your MYOB administrator email and password, and click Sign In.
-
Your MYOB company file must be hosted online. Learn more in Put your company file online from MYOB, or contact MYOB support for assistance.
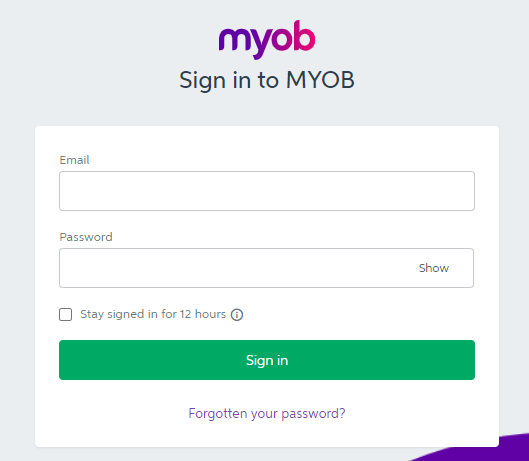
3. Choose your MYOB Company File and enter your MYOB administrator username and password.
- The administrator username is not the same as your MYOB email.
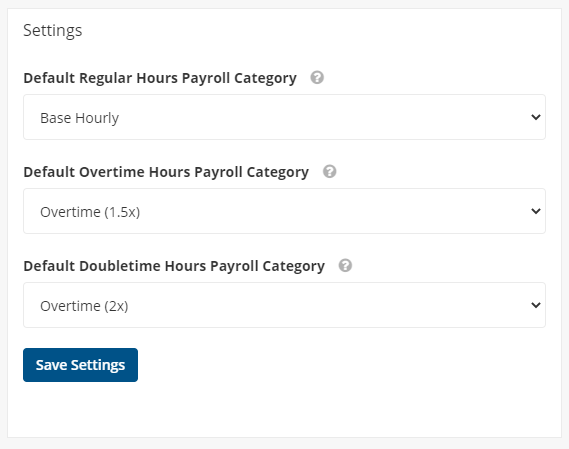
- In ClockShark, regular, overtime, and doubletime are determined by the ClockShark overtime rules, set up in Admin > Settings > Company. ClockShark time off policies, available on ClockShark Pro, are exempt from overtime rules.
Map employees, jobs and other data
To export time from ClockShark to MYOB, employees and jobs from ClockShark must be mapped to the correct employees and jobs in MYOB.
Optionally, you can also map customers and tasks if you intend to invoice from time, or want the MYOB customer/activity associated with the payroll cost in MYOB for reporting purposes.
With a ClockShark Pro subscription, ClockShark time off policies can also be mapped to MYOB payroll categories.
To map ClockShark and MYOB:
- In ClockShark web portal, go to Admin > Integrations and click Manage for MYOB.
- On the Integration Settings page, click View & Edit Mappings.
- Go to the Employees Mapping tab, and click Sync MYOB Employees > Sync Employees.
- If Auto Map is checked, any employees that exist in both ClockShark and MYOB with the same email address or first and last name will automatically be mapped together.
- The left-hand column displays the employees from your MYOB account. Only those that are tracking time in ClockShark need to be mapped to the employees from your ClockShark account, in the right-hand column.
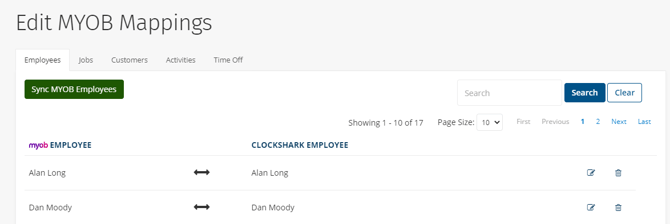
- To map an MYOB employee to ClockShark, click the Edit icon and select the correct ClockShark employee from the dropdown list.
- The dropdown list will show only active, unmapped ClockShark employees.
- To remove an employee mapping, select the trash can icon. The trashcan icon only removes the mapping and does not delete the employee in either ClockShark or MYOB.
- Go to the Jobs Mapping tab, click Sync MYOB Jobs > Sync Jobs.
- If Auto Map is checked, any jobs that exist in both ClockShark and MYOB with the same name will automatically be mapped together.
- Map the MYOB jobs in the left-hand column to the correct ClockShark jobs in the right-hand column. Only active, unmapped ClockShark jobs will be available to map.
- Optionally, go to the Customers and Activities Mapping tabs, repeat the syncing and mapping process.
- Mapping ClockShark and MYOB customers and tasks/activities is required if you are using time imported into the MYOB timesheets to invoice in MYOB.
- ClockShark Pro only: Go to the Time Off tab and click Sync MYOB Payroll Categories > Sync Payroll Categories. Map the MYOB Payroll Categories in the left-hand column to the correct ClockShark time off policy in the right-hand column.
You can now control mappings for your employees, jobs, customers, and tasks, and you can export time from your timesheets screen.