ClockShark Invoices and Billable Tasks are available on the Standard and Pro Plans
Providing a detailed Invoice to your Customer is both helpful for them to understand what they are being billed for and for you to make sure that you are getting paid for all the hard work you provided for them. ClockShark already helps you track detailed time broken down by the Job and Task so what better way to create these invoices than by using the time already tracked. Let’s explore how this powerful feature works.
Adding Billable Time
To start this process you can create or edit an invoice and select the “+ Unbilled Time” option.

This will open the Add Unbilled Time pop-up where you can select time tracked against billable Tasks for Jobs associated with the Customer and add it directly to the Invoice. This will show you the time worked this month by default or you can choose a custom range. Then you can choose how to want the added time to be displayed. It can be displayed as a lump total for each job, or broken down by task, day, or employee.
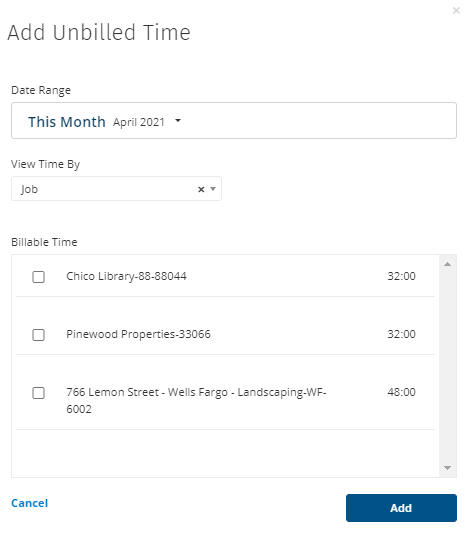
For the task, day, and employee groupings you can also select “Display individual shifts” to drill down into each separate time segment.
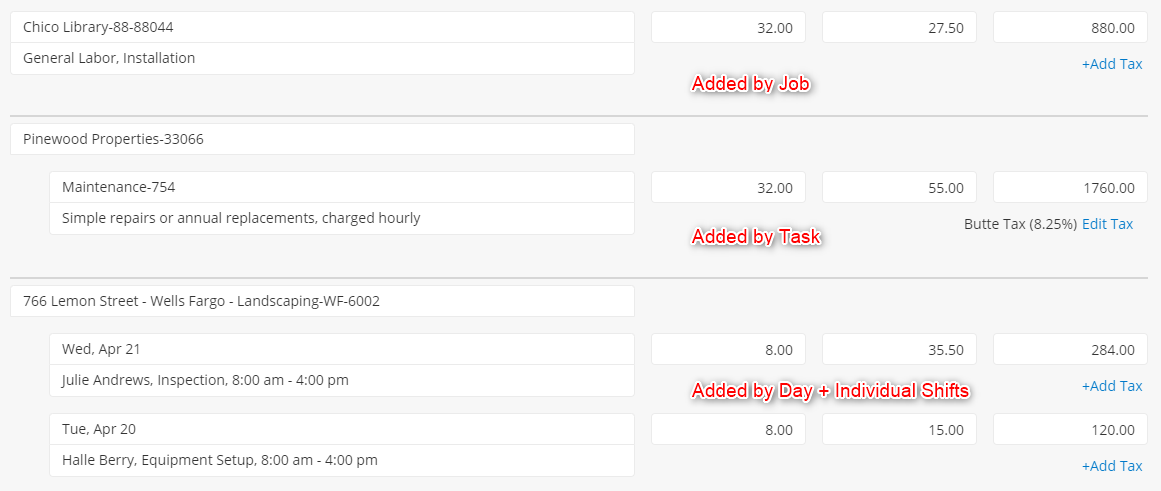
Depending on how you want the time broken down, this will change how the time appears on the invoice.
-
Adding by Job adds a line item with a summary of the tasks worked, number of hours, average rate, and total charge.
-
Adding time by Task will create a section with the Job name and line items underneath for each task selected. Each line item will include the number of hours, the billable rate for the task, the total charge, the default description for the task, and any default tax rates for the task.
-
Adding time by Employee and Day will create a section with the Job name and line items underneath for each employee and day selected. Each line item will have a summary of the tasks worked, number of hours, average rate, and total charge.
-
Adding time by Individual Shifts is an option when you add time by task, day, or employee. This will add a line item for each shift that your employee worked. The description will display the rest of the information for the shift which includes the task worked, date worked, time worked, and the employee that worked.
Once the time is added to the invoice, all fields are able to be edited as needed. Taxes can automatically be applied to tasks and to line items when there is only one task worked. This means that when you add time by Task or any combination of individual shifts, the default tax rate assigned to the Task will apply to the line item.
Note: The total charges for job, day, and employee are calculated by hours and rates assigned to each task. If time tracked against Tasks with different default Billable Rates is combined, the total charge is divided by the number of hours for an average rate.
Tasks
So now that we know how to add billable hours, let’s look at how we can customize this process. A lot of the information that comes from adding billable hours is tied to the task.
Tasks have fields to customize how they handle billable hours, or if they do at all. If a Task is marked “Billable” (which is the default) time tracked against it will be billable and can be added to invoices. If there are tasks you don’t bill the customer for (like Travel for example), you can uncheck the “Billable” checkbox. Any time tracked against a non-billable Task will not be an option to add to an invoice.
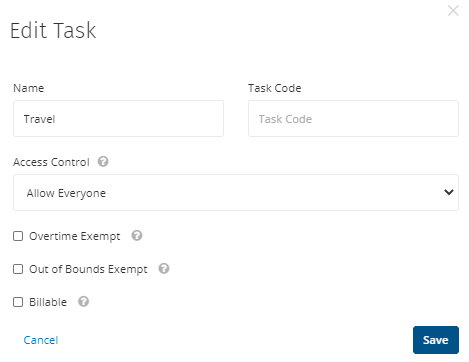
When the box is checked, there will be fields for a default billable rate, default tax rates to be applied, and also a default description. When adding billable time to the invoice, the line item rates and totals are calculated based on the billable rate you set here. The default description will only appear if you add time by Task. And as a reminder, the taxes will only be automatically applied to a line item when there is only one task worked on that line item. This means adding time by Task or any combination of individual shift methods.

Billed vs. Unbilled Time
Once the time is added to an invoice it is marked “billed” and cannot be added to another invoice. If you need to transfer the billable time to another invoice, you can delete the old invoice or delete the billable line items. This will make the time “unbilled” and available for selection again.
Note: Deleted invoices cannot be brought back to prevent duplication of billable time across invoices.
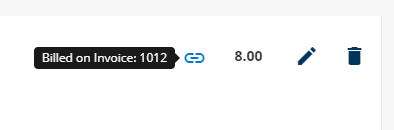
When you view any billed time on the timesheets you will see this chain icon letting you know this shift has been billed to an invoice. You can also click this icon to navigate right to the corresponding invoice as well.
Now you can bill your customers directly for the time your team already tracks in ClockShark. Talk about a time saver.
If you have any questions along the way please feel free to contact our Support team and get ready for answers!